Just
after I installed the Raspberry Pi 3 as home
server I promised myself I would have destined the old board to
more “experimental” experiences. As soon as I got some fee time I
so decided to explore Raspberry gaming capabilities. I'm far from
being a gamer today but I spent some time playing computer games when
I was younger, during the “Commodore Amiga age”.
RetroPie
RetroPie
is a Raspberry Pi distribution, based on Raspbian,
specialised on making the Raspberry a full featured gaming machine.
RetroPie image is provided with a great variety of emulation
software, a graphics user interface, gaming control support and a
configuration program to setup most of its options without the need
of keyboard and mouse. Among its features RetroPie allows to download
and install optional modules supporting things like media server
software and open source games.
Parts
list
Before
starting to install I collected the required hardware: The Raspberry
Pi, of course, a 8GB USB disk I had available, a wireless USB adapter
I already
used with the Raspberry and a cheap wireless keyboard I bought
during a surplus fair. Last but not least by bedroom TV was going to
be used as monitor. The wireless keyboard has been the only thing I
bought with this project in mind.
Installing
RetroPie
Installing
RetroPie is not different from installing Raspbian, I downloaded the
disk image from RetroPie download
page, then I copied the disk image on Raspberry micro-SD disk
using “dd” command
sudo dd bs=4M if=retropie-4.2-rpi1_zero.img of=/dev/sdd
Then
I mounted the newly created disk and added an empty “ssh” file in
order to enable SSH server.
touch /media/maxx/boot/ssh
Eventually
I inserted the micro-SD card in the Raspberry plugged it to the
network and powered it. After a quick network scan I’ve Ben able to
connect to the newly installed RetroPie machine.
RetroPie
configuration
The
first step in configuring RetroPie Has been, of course, configuring
Raspbian. I started the configuration program
sudo raspi-config
And,
as I already did before, I expanded the memory card file system and
changed “pi” user default password.
Then
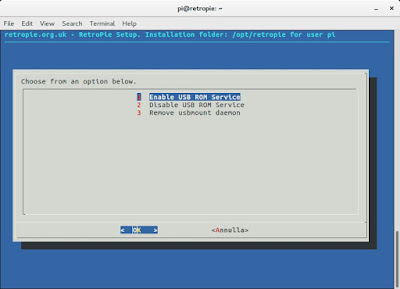
I started the RetroPie configuration script
sudo RetroPie-Setup/retropie_setup.sh
From
here I’ve been able to configure wireless network connection
And
to enable the USB
ROM Transfer Service.
At
last I connected the 8GB USB disk, formatted with a FAT file-system,
where I had previously created a “retropie-mount” folder.
mkdir /media/usb0/retropie-mount
RetroPie
automatically recognized the USB disk as the one where ROM files must
be stored and provided to create the required directory structure
inside of “retropie-mount” folder.
First run
I
connected the Raspberry to my TV HDMI port and powered all on, the
wireless keyboard has been recognised at once without the need of any
configuration. I only had to map keys to my preferences. I’ve been
positively impressed from Raspberry’s graphics capabilities, I own
it since some years but I always used it in headless mode. Of course
the Raspberry Pi 3 would behave much batter as game machine but I
prefer keep it on it's sever work. In the near future I’m planning
to explore the available optional modules, called “ports”,
especially the Kodi media server one.


No comments :
Post a Comment