"A human being should be able to change a diaper, plan an invasion, butcher a hog, conn a ship, design a building, write a sonnet, balance accounts, build a wall, set a bone, comfort the dying, take orders, give orders, cooperate, act alone, solve equations, analyze a new problem, pitch manure, program a computer, cook a tasty meal, fight efficiently, die gallantly. Specialization is for insects." (Robert A. Heinlein)

Friday 20 January 2012

Recovering photos from a damaged SD Card (again)

It happened again! I suppose it's because of some hardware problem but my old Sempron 2400, every now and then, makes unreadable a SD card while I'm reading it. This time the damage had been particularly nasty since the recovery method I usually apply (using foremost command) only recovered a handful of of files before stopping because of a “write error”. I so tried another recovery program: Photorec.

Installation and recovery

Photorec is part of the Testdisk disk recovery package it can be installed form Ubuntu's software centre or with apt-get command
sudo apt-get install testdisk
once installed Photorec can be executed by command line
sudo photorec
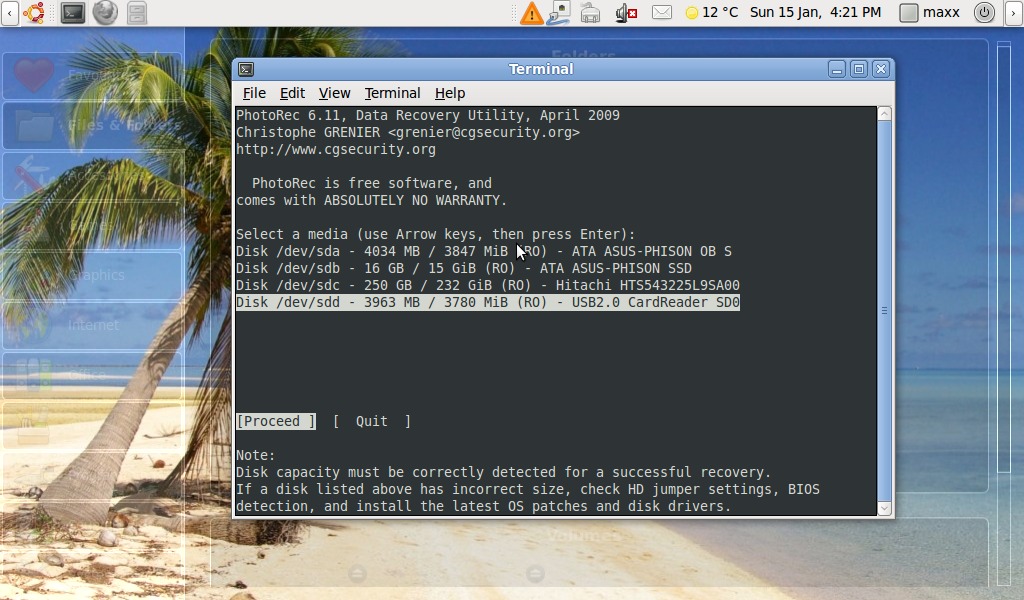
Photorec has a simple but effective character interface with a wizard-like organization: at first I've been asked for the device to recover

then the partition type, I selected “Intel

Tuesday 10 January 2012

Backing up the EEEPC with SystemRescueCd

I'm going to upgrade my EEEPC Linux installation, at last. Before doing any big operating system change It's a good practice to make a full backup of the system partition. Just in case something goes wrong and you want back your old working system. Dedicated Linux distributions are the ideal solution for partition backup and recovery since they let you easily recover even from a non-starting system situation. Last time I backed up my system partition, when I switched from Xandros to EEEBuntu I used Clonezilla. This time I decided to use a more flexible distribution: SystemRescueCd.

Installation


Like its name may suggest SystemRescueCd is a small Linux distribution specifically designed for disk recovery tasks, and it's provided with some invaluable (life saving) tools like GParted or Partimage. I downloaded SystemRescueCd ISO image from its download page then prepared a bootable USB disk following the site how-to.
First I mounted the ISO image
sudo mount -o loop,exec ./SystemRescueCd-x86-2.4.0.iso /tmp/sysrescd/
then I started the USB installation script from the mounted ISO image
cd /tmp/sysrescd/
sudo ./usb_inst.sh
a simple but effective interface shows-up there I selected the USB disk device and let the installation start.

It may happen that the Installation interface shows your device with a 0MB disk size and then exits with an error message when you try to install. This can be easily solved (thanks to this forum post) by manually unmounting your device using the console command.
umount /dev/sdd1