

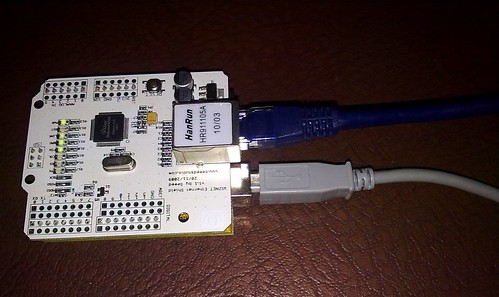
Unfortunately the board I managed to get is a quite cheap one, respect the one displayed at the Arduino site, since it lacks the SD card reader (and even the passing-trough connector).
First tests
Of course I didn't manage to do a lot, with the Ethernet shield, apart some basic testing of the code provided with the Arduino board, in order to verify that the board is properly working. Here is the example code that implement a basic web server returning the status of Arduino's analog inputs. I only had to adapt it to match my network configuration.
/*
Web ServerA simple web server that shows the value of the analog input pins.using an Arduino Wiznet Ethernet shield.Circuit:* Ethernet shield attached to pins 10, 11, 12, 13* Analog inputs attached to pins A0 through A5 (optional)created 18 Dec 2009by David A. Mellismodified 4 Sep 2010by Tom Igoe*/
#include <SPI.h>#include <Ethernet.h>
// Enter a MAC address and IP address for your controller below.// The IP address will be dependent on your local network:byte mac[] = { 0xDE, 0xAD, 0xBE, 0xEF, 0xFE, 0xED };byte ip[] = { 192,168,0, 15 };
// Initialize the Ethernet server library// with the IP address and port you want to use// (port 80 is default for HTTP):Server server(80);
void setup(){// start the Ethernet connection and the server:Ethernet.begin(mac, ip);server.begin();}
void loop(){// listen for incoming clientsClient client = server.available();if (client) {// an http request ends with a blank lineboolean currentLineIsBlank = true;while (client.connected()) {if (client.available()) {char c = client.read();// if you've gotten to the end of the line (received a newline// character) and the line is blank, the http request has ended,// so you can send a replyif (c == '\n' && currentLineIsBlank) {// send a standard http response headerclient.println("HTTP/1.1 200 OK");client.println("Content-Type: text/html");client.println();
// output the value of each analog input pinfor (int analogChannel = 0; analogChannel < 6; analogChannel++) {client.print("analog input ");client.print(analogChannel);client.print(" is ");client.print(analogRead(analogChannel));client.println("<br />");}break;}if (c == '\n') {// you're starting a new linecurrentLineIsBlank = true;}else if (c != '\r') {// you've gotten a character on the current linecurrentLineIsBlank = false;}}}// give the web browser time to receive the datadelay(1);// close the connection:client.stop();}}
All the code is simply made from a setup() function that provides to MAC and IP address initialization and a main loop() function where the board returns the HTML page.
Conclusions
Since first time I tried Arduino I've been impressed by its easiness of use and how its rich set of libraries could hide complex behaviour behind few lines of code. Adding an Ethernet shield to an Arduino board make it capable of even more complex actions, like handling Ethernet and network protocols, without adding a great deal to code complexity.
Lovely post.Thanks for sharing this information.This is indeed a very informative post.
ReplyDeleteThanks for visiting!
Delete