"A human being should be able to change a diaper, plan an invasion, butcher a hog, conn a ship, design a building, write a sonnet, balance accounts, build a wall, set a bone, comfort the dying, take orders, give orders, cooperate, act alone, solve equations, analyze a new problem, pitch manure, program a computer, cook a tasty meal, fight efficiently, die gallantly. Specialization is for insects." (Robert A. Heinlein)
Showing posts with label upgrade. Show all posts

Saturday, 27 October 2018

Hard disk upgrading with Clonezilla


Some time ago my desktop computer welcomed me with an unpleasant message: the main hard drive was likely to fail soon.

When you receive similar messages you never know how soon “soon” means. Since disk drives prices are reasonably low I decided not to waste time, I so bought a new, bigger, hard drive to replace the faulty one.
Upgrading the computer main drive could be a time consuming business if done “by hand” since it means copying all system and user data. Fortunately many tools exist in the Linux world to ease the process, among them Clonezilla.


Clonezilla


Clonezilla is a, very small foot-print, Linux distribution dedicated to disk and partition backup or cloning. I already used it once to backup EEEPC original Xandros installation. I downloaded Clonezilla ISO image and installed it on a SUB disk using Unetbootin. Because of its very small size I’ve been able to install Clonezilla on a old 1GB USB drive.
Before starting Clonezilla Iinstalled the new drive on my desktop PC together with the old one and partitioned it using Gparted.
At boot Clonezilla offer some boot options, I selected the default one
Then, once the system had started, after the long language and keyboard selection menu, I’ve been shown several options. I selected to work in a “device-device” mode then selected the “local partition-to-local partition” copy mode.
I proceeded with copying partition one from the old disk to partition one in the new disk, once completed I repeated with partition two.
At last I powered of the computer, removed the old faulty disk and left the new one in its place. I restarted the system but, the new disk didn’t boot.
After a while I figured I forgot that Clonezilla, when copying partition-by-partition, didn’t copy boot information. Not a big deal, once you understand it.
Eventually I started again the system using Clonezilla and, using command line interface, I installed GRUB on the new disk.
sudo mkdir /mnt/ubuntu
sudo mount /dev/sda1 /mnt/ubuntu
sudo grub-install --boot-directory=/mnt/ubuntu/boot /dev/sda
After this my computer started, working like before.
By the Way now I have a unreliable spare 500 GB hard disk, what could I use it for?

Friday, 27 May 2016

Upgrading (the EEEPC) with low disk space


When, while installing Xubuntu, I decided EEEPC disk partitioning I based my decision on previous installation typical disk usage worrying mostly about “/home” and “/usr” partitions. I never would have thought about running out of space in the root “/” partition.
Then, the first time I tried to upgrade to latest Xubuntu distribution I got an error message about disk free space on partition being not enough to download distribution files (that usually take a little less than 1GB of disk space). Examining disk free space I discovered that very little free space was left on the root partition even if it was more then enough after my post-installation check.
Fortunately AskUbuntu came quickly at recover: here I quickly found a question asked from who had the same problem. To be precise the question was about problems with “/boot” partition low disk space bat I suppose it was because of a different partitioning schema, by the way solution worked for me.

Cleaning “apt-get” leftovers

As I learned from AskUbuntu question some of the “lost” disk space might be occupied by unused files or apt-get temporary files. So simply by executing the following commands …
sudo apt-get autoremove
sudo apt-get clean
some disk space can be set free.

Removing old Linux kernel images

If free space gained from the previous operation isn't enough some more space can be obtained by removing old Linux kernel images. Every time Ubuntu upgrade to e new kernel release the old one is kept available in to be used to solve possible compatibility issues. Such feature is scarcely user and is of no use at all in the eve of a major distribution upgrade.
First the currently used Linux kernel must be identified the command …
uname -a
does the job, here is the current output
Linux eeepc900 4.4.0-21-generic #37-Ubuntu SMP Mon Apr 18 18:34:49 UTC 2016 i686 i686 i686 GNU/Linux
while the command …
dpkg -l 'linux-image*'
lists all Linux kernel images currently installed, here is a sample output:
Desired=Unknown/Install/Remove/Purge/Hold
| Status=Not/Inst/Conf-files/Unpacked/halF-conf/Half-inst/trig-aWait/Trig-pend
|/ Err?=(none)/Reinst-required (Status,Err: uppercase=bad)
||/ Name Version Architecture Description
+++-==============-============-============-=================================
un linux-image <none> <none> (no description available)
un linux-image-3. <none> <none> (no description available)
rc linux-image-3. 3.19.0-15.15 i386 Linux kernel image for version 3.
rc linux-image-3. 3.19.0-28.30 i386 Linux kernel image for version 3.
rc linux-image-3. 3.19.0-33.38 i386 Linux kernel image for version 3.
rc linux-image-3. 3.19.0-43.49 i386 Linux kernel image for version 3.
ii linux-image-3. 3.19.0-56.62 i386 Linux kernel image for version 3.
ii linux-image-4. 4.2.0-34.39 i386 Linux kernel image for version 4.
ii linux-image-4. 4.4.0-21.37 i386 Linux kernel image for version 4.
rc linux-image-ex 3.19.0-15.15 i386 Linux kernel extra modules for ve
rc linux-image-ex 3.19.0-28.30 i386 Linux kernel extra modules for ve
rc linux-image-ex 3.19.0-33.38 i386 Linux kernel extra modules for ve
rc linux-image-ex 3.19.0-43.49 i386 Linux kernel extra modules for ve
ii linux-image-ex 3.19.0-56.62 i386 Linux kernel extra modules for ve
ii linux-image-ex 4.2.0-34.39 i386 Linux kernel extra modules for ve
ii linux-image-ex 4.4.0-21.37 i386 Linux kernel extra modules for ve
ii linux-image-ge 4.4.0.21.22 i386 Generic Linux kernel image
eventually older kernel images can be removed with an “apt-get” command like the following, changing of course the version number
sudo apt-get -y purge linux-image-x.yy.z-tt-generic linux-image-extra-x.yy.z-tt-generic linux-headers-x.yy.z-tt linux-headers-x.yy.z-tt-generic
If you look deeper in AskUbuntu answer you'll see that more complex scripts can be used to make the operation faster. I stopped here, I don't like automating too much when deleting things and, after all, this it's I problem I get into at most twice a year. So … I can do it manually

Wednesday, 15 January 2014

Netbeans 7.4 on the EEEPC 900

It has been a while since last time I wrote about Netbeans installation on the EEEPC 900. I usually use Eclipse as my preferred Java IDE, both at work and at home, but on the nine inch EEEPC display Eclipse has too many parts falling off-screen. I so started using Netbeans on the EEEPC and, as the time passed, I learned appreciating it.


Installation


Installing Netbeans on Linux is quite simple: I downloaded the installation script made it executable and started it like following:
chmod +x netbeans-7.4-javase-linux.sh
sudo ./netbeans-7.4-javase-linux.sh
Then I just followed the wizard instructions:

Saturday, 21 December 2013

Upgraded the EEEPC 900 RAM


I at last decided to buy a 2GB SO-DIMM to install on my old EEEPC 900. The installation process has been quite simple just matter of unscrewing the rear cover, unplugging the old module and replacing it with the new one.

The EEEPC performances have been improved only marginally, at least during everyday uses. By the way the upgrade did cost me only 25€.
So this short post is mostly a reminder, to my readers and myself, that all test I'll do on the EEEPC since now will be with the upgraded 2GB RAM and not with the original EEEPC 900 configuration.

Thursday, 31 October 2013

Upgraded to Ubuntu 13.10 “Saucy Salamander”


This is just a short post to report about the upgrade of my two computers to the latest Ubuntu release. I upgraded just after the distribution release (Saturday 19) but various problems kept me from writing about it.


Wednesday, 24 October 2012

Upgrading to Ubuntu 12.10 “Quantal Quetzal” (on the Veriton S661)

The upgrade season arrived at last. As soon I got enough free time, last week-end, I started the upgrade process on my desktop computer.


Doing the upgrade


At first, since the installed version was a LTS one, I had to enable notification for any new versions in the “software sources” configuration.
after that the update manager activated the “Upgrade” button

Tuesday, 1 May 2012

More Mint 12 tuning on the EEEPC 900


After installing Linux Mint 12 on the EEEPC and fixing some immediate post installation issues my netbook has been working fine in all but one last thing. When running on battery power the EEEPC often warned the battery being near to full discharge. Sometimes the computer went in automatic power off even with the battery almost fully charged.
It's no new that the early EEEPCs battery aren't properly recognized on most of Linux distributions. That's because of the buggy way EEEPC BIOS handles ACPI, I noticed it since I first installed Ubuntu years ago, but it usually never been a problem apart from some meaningless estimation of the battery duration.

Sunday, 29 April 2012

Upgraded to Xubuntu 12.04 “Precise Pangolin”


Just a short post about the upgrade to Xubuntu 12.04 of my (old) Sempron 2400 desktop computer. As I started the computer this morning I got the usual Ubuntu upgrade “Invitation”

I started the upgrade program after a final window informing on operation to be performed and requesting for a last confirm the whole upgrade process started

Saturday, 18 February 2012

Linux Mint (on the EEEPC): fixing some post-installation issues

The installation (upgrade) of Linux Mint 12 on my EEEPC left the system with some little problem to be solved together with many applications that had to be reinstalled. Not all of these problems are Mint-specific since one, at least, hat its solution reported on a Ubuntu forum. And I'm not also sure if these problems appears after upgrading from Ubuntu to Mint 12 or after a fresh installation too. By the way all have been solved with a couple of shell commands. I spent more time looking for solutions than executing them, so I hope it might be useful to have them all in the same page.

Missing Windows boot option

The first thing I noticed once I rebooted the EEEPC just after installing Linux Mint was that the Windows boot opting was missing from the Grub boot menu. After a brief looking for it in the 'net I did find on Mint forum a couple of commands to solve it:
sudo os-prober
sudo update-grub

Friday, 21 October 2011

Upgraded the Sempron 2400 to Xubuntu 11.10 “Oneiric Ocelot”

Just after Ubuntu new release also derivative distributions arrived as well. I so went through the upgrade process of the Xubuntu installation on my (old) desktop computer. I've been informed of the availability of the new release with the, almost daily, software update request. I then selected the “upgrade” button and let the whole process start.
xubuntu-11-10--0
the upgrade proceeded slowly but quite smooth, it showed some error in the process but it doesn't seem to have influenced the final result.

Wednesday, 8 June 2011

Netbeans 7.0 on the EEEPC 900

As some of my readers may already know I use the EEEPC also as a highly portable development environment. Netbooks aren't meant for heavy writing tasks like programming but having a handy development environment ready to experiment what you have just read on an e-book is a priceless feature for a programmer like me. (let me add that I doubt that e-readers or tablets will ever able to provide such feature). I so decided to upgrade Netbeans, Sun's (now Oracle's) development environment to the latest version (from 6.9 to 7.0).

Installation

Installing Netbeans is a quite simple task: I downloaded the self extracting script from Netbeans download page, made it executable:
chmod +x netbeans-7.0-ml-javase-linux.sh
and executed it as super user
sudo ./netbeans-7.0-ml-javase-linux.sh
Super user is only needed if you want install Netbeans in a path available to all users, you can execute the installation script normally and install Netbeans in your home folder.
As the installation application starts it welcomes you, as usual, with a couple of friendly license agreements

Tuesday, 3 May 2011

Upgraded my Sempron 2400 to Xubuntu 11.04

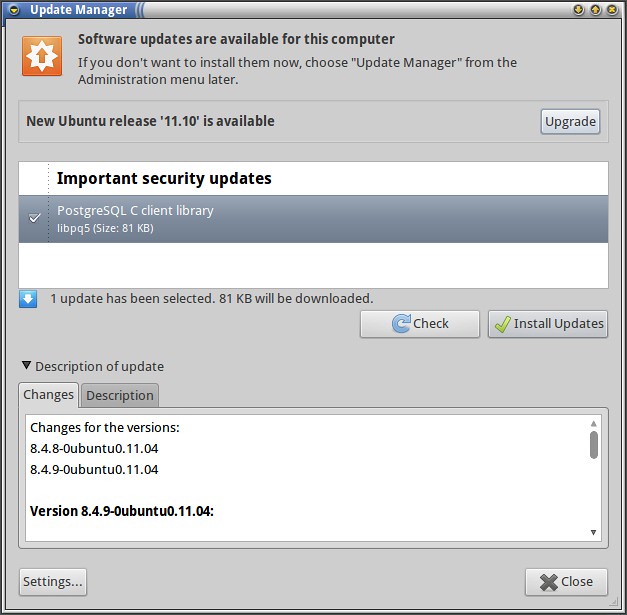
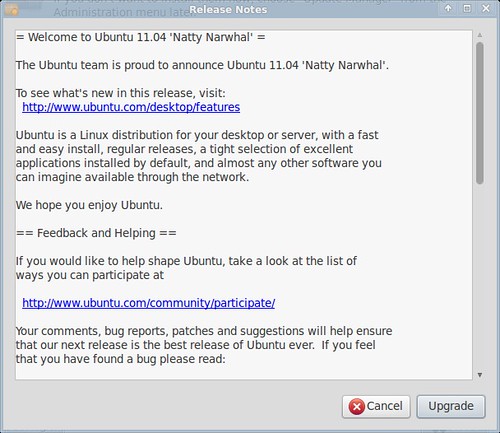
Ubuntu spring upgrade time continue … just a day after Ubuntu “Natty Narwhal” release also Xubuntu 11.04 has been made available. Since I already had positively tested the beta version on my desktop computer (Sempron 2400) I decided to go straight with upgrading it with the new release.
xubuntu-screenshot-1


Wednesday, 20 October 2010

Upgrading to Xubuntu 10.10

As soon as the new release of XFCE4 based Ubuntu (Xubuntu) has been made available I decided to upgrade my desktop computer (Sempron 2400).

The upgrade process (Where my “upgrade invitation” is?)

As soon as I saw the new release available on Xubuntu home page I launched the update-manager program in order to upgrade but … I couldn't see usual upgrade to a new release button. After some time I discovered that, being current version a LTS, Xubuntu's upgrade manager was configured to only notify new LTS releases. After disabling that option I eventually got my release upgrade button.

Tuesday, 4 May 2010

Upgraded the EEEPC 900 to Ubuntu 10.4 (NBR)

The big upgrade season has, at last, arrived. The first computer I decided to upgrade to the freshly arrived Ubuntu distribution is the EEEPC 900.

Night-time upgrade process

Tuesday night, the 29th, I noticed the “New release available” button displayed in Ubuntu update manager. I so decided to start the upgrade process and to go to sleep also because the download process was promising to be quite long (it did take about two hours at last).

upgrade 10.4


Upgraded the PIII550 to Ubuntu Server 10.4

The upgrade season continues: after upgrading the EEEPC 900 I decided to upgrade the little headless server (PIII at 550MHz) I keep mainly as Torrentflux server and for server-side experimenting.

Upgrade process (a little troublesome)

I started the upgrade process, as suggested in this Ubuntu page:
sudo do-release-upgrade --devel-release
The upgrade program informed me that I was upgrading from a SSH session and, once I confirmed, it started with the download of new files (quite a smaller download than standard Ubuntu). Unfortunately I had the bad idea of continue working on my desktop computer (Sempron 2400) and I managed, at last, to have my desktop system locked and the SSH connection, with the upgrading process, lost. (Definitively memory intensive processes like panorama stitching aren't a good Idea while waiting for some important task to complete). As second error I did not use the GNU Screen utility to start upgrade process so I had no mean to recover the lost session. At last I did let the upgrade process to continue until I realized, checking it with the “ps” command, that it was clearly waiting for an user input. At this point I had no option but to restart the computer.
After the computer restarted I launched again the “do-release-upgrade” command (I used the screen command before this time) and the upgrade process resumed exactly from point it was arrived before. I cannot guarantee that you can stop and restart the upgrade process from any point but fortunately it worked from me. The upgrade process continued, with e lot of replace-or-keep-old-file user input requests until it arrived to the final restart and I had, eventually, my little server fully upgraded and working.

Conclusions

The second upgrade has been successful even if with some problems (my fault not Ubuntu's) just one thing: if you are running some important task over an SSH connection never ever forget using the screen utility before.

Tuesday, 10 November 2009

Upgraded to Ubuntu 9.10

I recently upgraded my desktop computer (Sempron 2400) to the last released Ubuntu version. I decided to upgrade using the Ubuntu update manager, I so started the upgrade process and ... went to bed since it promised something like eight hours of download time.
The day after I continued the installation process and, at last, restarted my machine.